This is Hafiz Al Farabi Website

Categories
Project IT

Tiniy Bit Controller-2

Tiny Bit Controller - With Python

Okay, so for this project, I built a Tiny Bit controller, similar to the project we did in 7th grade, second semester, but the programming language is different we used block coding back then, and now we’re using Python. Another difference is that we built the framework ourselves instead of using the pre made Tiny Bit kit. For this project, it was my turn to explain the wiring and describe the components in the Tiny Bit

Categories
Project IT

Infographic – Design

Infographic Design

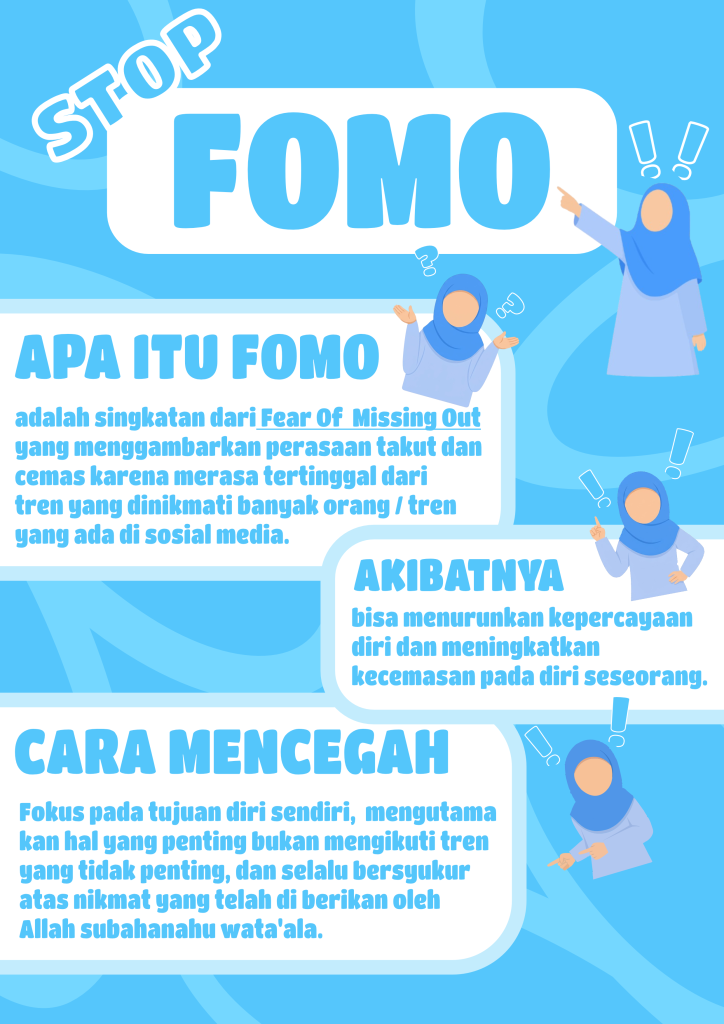
This poster explains FOMO, which stands for Fear Of Missing Out. It is the anxious feeling people get when they see trends on social media and feel left out. The poster uses a light blue color scheme with playful bubble shaped cards and a bold STOP FOMO title, making it feel friendly and easy to read.

The content is split into three cards. What is FOMO explains what FOMO means. Akibatnya explains that FOMO can lower self confidence and increase anxiety. Cara Mencegah gives solutions, like focusing on personal goals, prioritizing what matters, and being grateful to Allah.

Overall the poster is simple and clear. It explains the problem first, then gives a positive solution. The clean shapes and rounded cards suggest it was made using Affinity Designer or Publisher.

Categories
Project IT

Poster Design

Poster Design

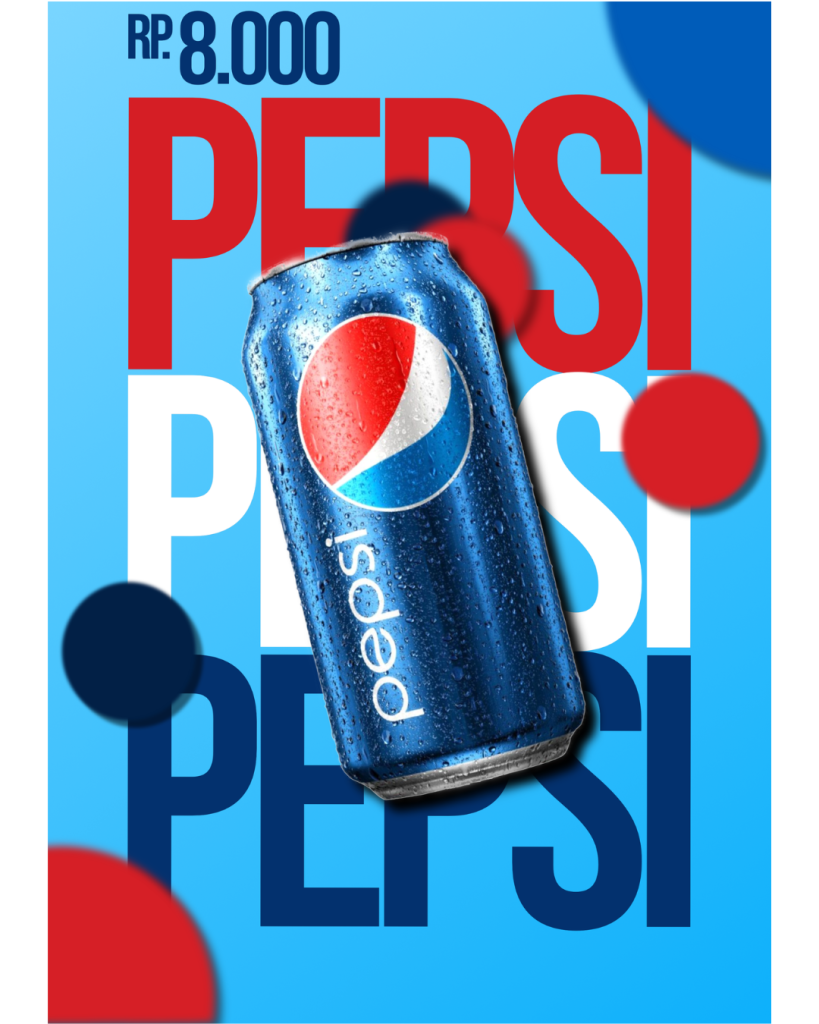
For my second multimedia project, I was assigned to create a promotional poster using Affinity Designer. I chose Pepsi as the main product and designed a modern, eye-catching poster with a simple layout and bold typography. Before I started designing, I collected the product image, selected a suitable color palette based on Pepsi’s brand identity, and planned the composition. Overall, I spent around four days completing this project from start to finish.

I created the poster step by step. I first designed the background using a light blue gradient to match Pepsi’s colors. After that, I added the large “PEPSI” typography in different colors to create depth and make the design more attractive. Next, I placed the Pepsi can in the center, adjusted its angle, and added a shadow to make it stand out. Finally, I included the price at the top and added several colored circles around the poster to give it a more dynamic and balanced appearance.

While working on this project, I would not say that it was easy, but I also would not call it very difficult. The most challenging part was arranging all the elements so that the poster looked clean without feeling empty or overcrowded. Even so, I enjoyed the design process because I learned more about composition, typography, color harmony, and visual balance. This project also helped me improve my creativity and taught me that a simple design can still be effective when every element is carefully planned and placed.

Categories
Project IT

Design Ilustration

Design Ilustration

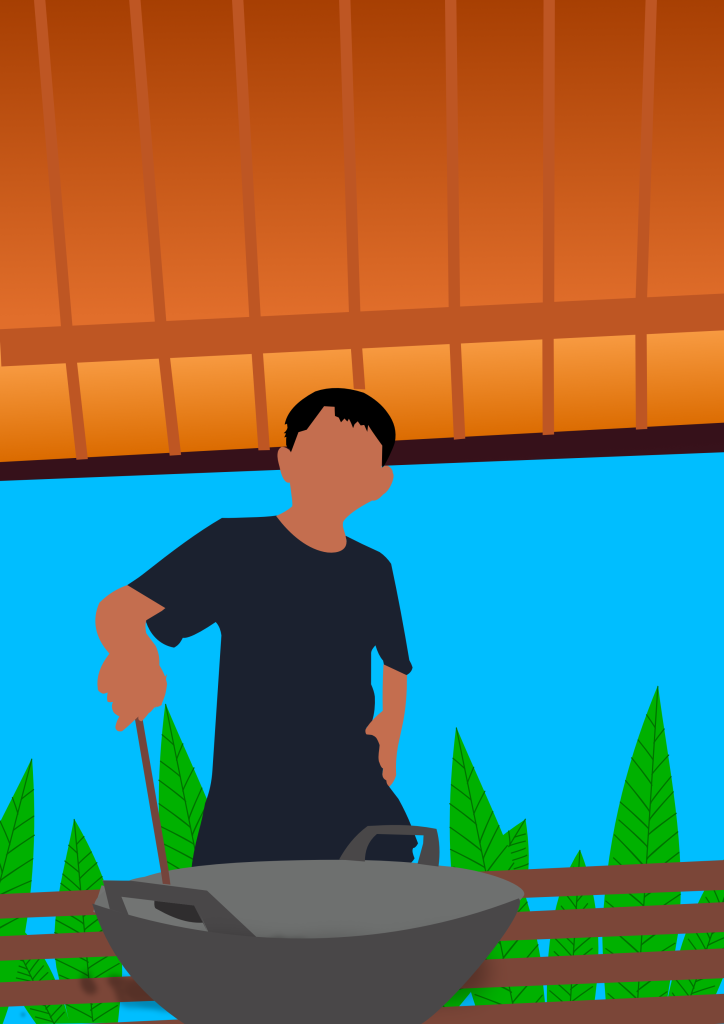
For my first multimedia project, I was assigned to create an illustration based on a photo that I took myself from my own files. I made the illustration using vector tools in Affinity Designer. Before I started drawing, I first prepared the photo and carefully observed every detail so that the final result would look as similar as possible to the original image. Overall, I spent around five days completing this project from start to finish.

I worked on the illustration step by step. I started with the hair because it had many small details and different shapes. After that, I continued with the face, the arms, the spatula, the clothes, the background, and the other parts of the image. The arms were probably the most difficult part for me, and I think they did not turn out as well as the other sections. Even though some parts were challenging, I kept making small adjustments until I was satisfied with the overall result.

While working on this project, I would not say that it was easy, but I also would not call it very difficult. The process was quite detailed and sometimes a little fiddly because every vector shape had to be placed carefully. However, I really enjoyed creating this illustration because I learned a lot about using vector tools and improving my attention to detail. This project also taught me to be patient and to keep practicing, since good results come from taking time and focusing on every small detail.

Categories
Project IT

Smart Parking

Smart Parking

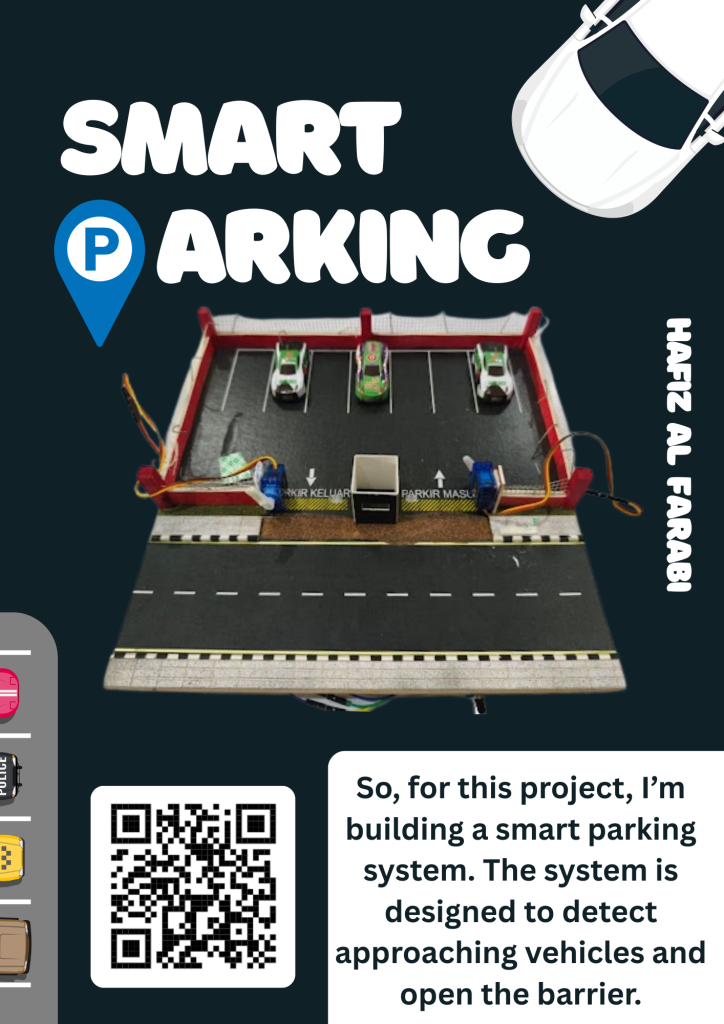
So, for this project, I’m building a smart parking system that works similarly to the parking systems found in hospitals, malls, hotels, and other places. so it detects when a car is near the entrance gate or exit gate, and it’s immediately detected by an IR sensor, causing the gate to open—the gate uses a servo—and of course, all of this requires commands/coding, so here we use MakeCode to write the code, and then we upload it to the Microbit. Oh, and I didn’t build this alone; I worked on it with Fadhil, Hakam, Izaldin, and of course, myself.

Categories
Project IT

Video Tutorial Make Code

Video Tutorial Make Code

So, in this tutorial video, I’m making a tutorial about MakeCode. Here, I explain what MakeCode is. MakeCode is a code block that we can use to input code into Microbit, and here we can create things like a smart trash bin, Tiny Bit Lane Follower, Tiny Bit Hand Gesture, Tiny Bit Bluetooth Controller, and many more things that we can make from the command blocks available in MakeCode. Oh, and I also explain some of the code that I understand or have learned, and for the rest that I don’t understand, I just show it.

Categories
Project IT

Tiny Bit Line Follower

Tiny Bit Line Follower

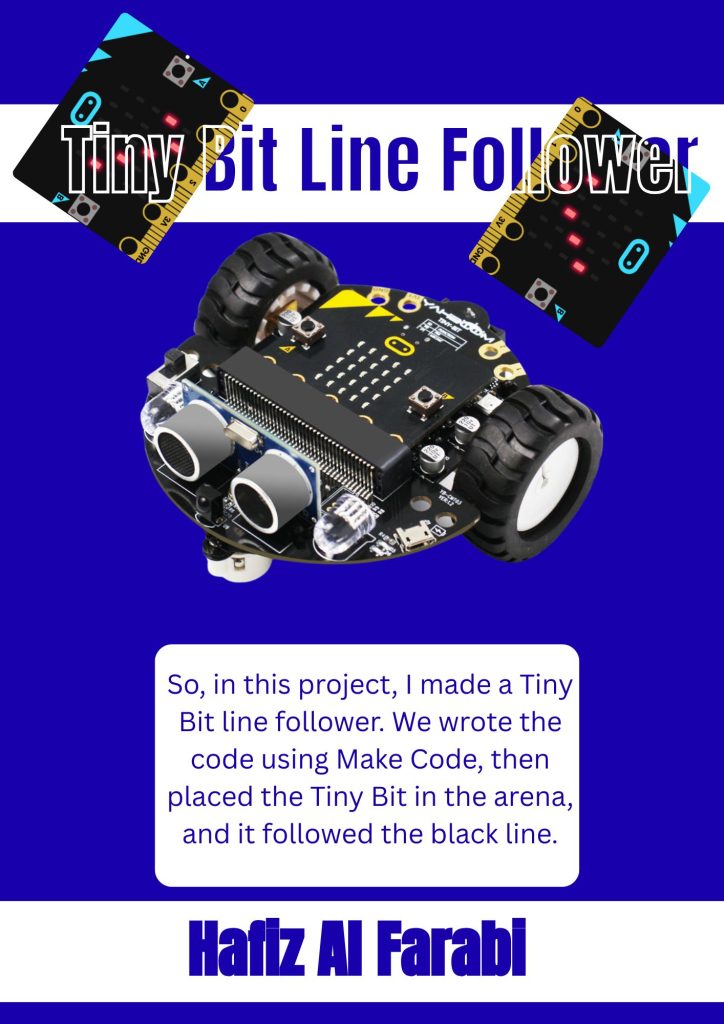
So, in this project, I was assigned to make my Tiny Bit line follower follow a prepared black line. There are three levels. In the first level, Tiny Bit must follow the line, but the line only twists and turns. In the second level, Junior, we must pass challenges such as broken lines that twist and turn. In the third level, Senior, it is more or less the same as Junior, but the path is longer. Oh, and for this project, I’m working in a group with Khalifa Hussein Haqqafi.

Categories
Project IT

Microbit Basic – Smart Trash Bin

Microbit Basic - Smart Trash Bin

In this project, I created a smart trash can. This smart trash bin is useful if you don’t want to touch the lid. You just need to bring your hand close to the smart trash bin, and the lid will open. Here are the important components needed to make the smart trash bin: an Arduino, a Micro:bit, a servo motor, and jumper cables. For this project, my group consists of Abyan and Falah. However, when Abyan and I were recording, Falah was still teaching with my other friends.

Categories
Project IT

Tiny bit Hand Gesture

Tiny bit Hand Gesture

This project is similar to the first project, except that we use our hands to operate it. The website we use is also the same, namely Lofi Robot, but the difference is that we use hand gestures to operate it, such as right, left, and so on. Oh yes, before we access Lofi Robot Hand Gesture, we must first access Teachable Machine to input our hand gestures, just like before. My partner is Ibrahim Evo Syarif.

Categories
Project IT

Tiny bit Bluetooth Controller

Tinybit Bluetooth Controller

The Tiny Bit Controller is a robot that can be controlled indirectly, not directly like a remote control. Instead, we have to code it using block coding on Microbit (web) and then input it into Microbit. What is Microbit? Microbit is the brain of a robot, so it’s not just the Tiny Bit Controller that we can use. Microbit has many uses, such as automatic trash cans, hand gestures, and others. Oh, by the way, here I’m working in a group with my classmates and also my roommate named Ibrahim Evo Syarif.